
A patio can look great on day one and still become a problem a year later. That usually comes down to the part most people never see - the base, the grading, and the installation details that decide whether the surface stays level or starts to shift. Good paver patio installation is not just about choosing an attractive style. It is about building an outdoor surface that handles weather, foot traffic, drainage, and time.
For homeowners and property managers, that matters because a patio is not a small accent feature. It changes how a yard functions, how a property feels, and how much upkeep the space will need later. When the work is done correctly, a paver patio adds a clean finished look and creates a usable area for seating, dining, walkways, or outdoor entertaining. When corners are cut, the same project can lead to weeds in the joints, uneven edges, pooling water, and expensive repairs.
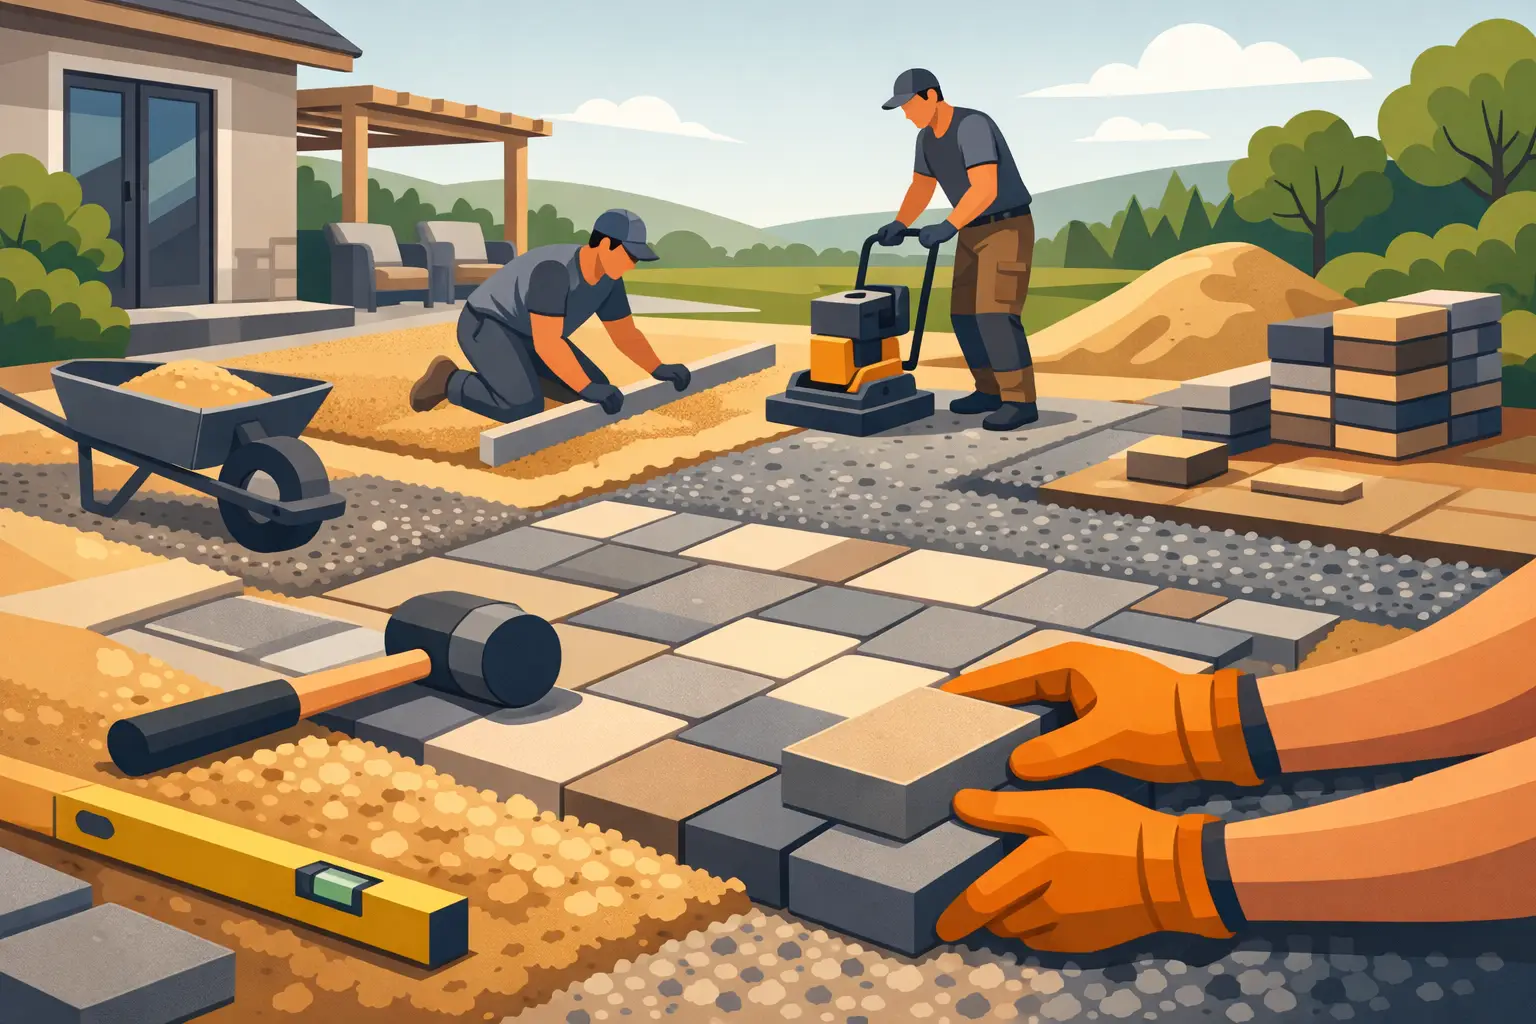
What paver patio installation really involves
From a distance, a paver patio looks simple. Individual units are set in a pattern, the joints are filled, and the space is ready to use. In practice, the finished surface depends on several layers working together.
The first layer is excavation. The area has to be dug to the right depth based on the paver thickness, base material, bedding layer, and final height. That depth is not guesswork. If the excavation is too shallow, the patio may sit too high against nearby surfaces or fail under load. If it is too deep without proper compaction, the patio can settle unevenly.
Next comes the base, which is where the real strength comes from. A properly installed aggregate base is compacted in lifts so the patio has a stable foundation. On top of that sits a thin bedding layer that helps the pavers set evenly. Then the pavers are installed in the chosen pattern, edged to hold the field in place, compacted again, and finished with joint material.
Each step affects the next one. That is why experienced installers pay close attention to grade, soil conditions, transitions to nearby concrete or lawn areas, and the intended use of the patio.
Why the base matters more than the paver itself
Clients often focus first on shape, color, and pattern. Those choices absolutely matter because they determine the final appearance. But the paver itself is only part of the job. The hidden structure underneath has a bigger impact on whether the patio performs well over time.
A strong base helps prevent common failures like low spots, rocking pavers, and separation along the edges. It also supports drainage. Water is one of the biggest threats to hardscape surfaces, especially when runoff is directed toward the patio or the surrounding grade is inconsistent.
This is where professional installation makes a difference. A patio should be planned in relation to the entire outdoor space, not treated like an isolated square of stone. If nearby beds, sod areas, retaining elements, or concrete surfaces are part of the same project, the finished layout should feel connected and function as one complete space.
Choosing the right patio layout for the property
Not every yard needs the same patio design. A compact backyard may benefit from a simple rectangular layout with clean borders and room for a grill and table. A larger property may need multiple zones, such as a main seating area with a connecting path or a patio that transitions into planting beds and open lawn.
The right layout depends on how the space will be used. For homeowners, that often means thinking beyond the patio itself. Will it connect to a back door without creating a step hazard? Does it leave enough room for circulation around furniture? Will it direct guests naturally through the yard? For small commercial properties, the focus may be on durability, clean lines, and a layout that supports traffic without looking overly busy.
There is also a style trade-off to consider. Larger pavers can create a more modern look and may make a small space feel less crowded. Smaller units and more detailed patterns can add character, but they may also create a busier visual effect. Neither option is automatically better. It depends on the architecture of the home, the size of the area, and the look the property owner wants.
Paver patio installation and drainage
One of the most overlooked parts of paver patio installation is water management. A patio should not trap water against a house, garage, or adjacent slab. It should be graded to move water away from structures and avoid standing water on the surface.
That sounds straightforward, but drainage can become more complex when a yard already has slope issues or when the patio ties into existing hardscape. Sometimes the best patio design is not the biggest one. Reducing the footprint slightly or adjusting the shape can make drainage work better and reduce future trouble.
This is also why site conditions matter. Soil type, surrounding elevation, and nearby downspouts all affect the installation plan. What works well in one backyard may not be the right approach in another. A dependable contractor looks at those details before the first paver is ever placed.
Common mistakes that lead to patio problems
Most failed patios do not fail because the pavers were unattractive. They fail because the installation process was rushed or simplified.
Poor compaction is one of the biggest issues. If the base is not compacted properly, the patio may settle in certain spots and stay high in others. Inadequate edge restraint is another common problem. Without strong edges, pavers can spread over time, especially near curves or heavily used borders.
Joint failure also causes trouble. If joint sand is not installed correctly or maintained as needed, pavers can loosen and weeds may become more noticeable. Improper grade creates another set of issues, from puddling to water moving toward the foundation instead of away from it.
These are not just cosmetic concerns. Uneven surfaces can become trip hazards, and drainage problems can affect nearby landscape areas, foundations, or adjoining concrete.
When pavers make more sense than concrete
Pavers and concrete both have a place in outdoor construction. For some projects, a poured concrete patio is the right fit, especially when a client wants a clean slab surface or is coordinating with a concrete driveway or stamped concrete features elsewhere on the property.
Pavers, though, offer flexibility that many clients value. Because the patio is made of individual units, repairs can be more targeted if a section ever shifts or needs adjustment. Pavers also provide more design variation in pattern, tone, and border detail. For properties where visual texture matters, that can be a major advantage.
There are trade-offs. Paver patios typically involve more labor and detail during installation, and material choices can affect overall cost. But for many homes, the finished appearance and long-term serviceability make that investment worthwhile.
What to expect from a professional installation process
A well-run project should feel organized from the start. That begins with a site visit and a clear discussion about use, layout, drainage, and material options. The proposal should reflect the actual conditions of the property, not a one-size-fits-all patio package.
Once the plan is set, the work should move in a logical sequence. The site is marked out, excavation is completed, the base is installed and compacted, and the pavers are placed with attention to line, spacing, and edge detail. Clean transitions matter. A patio should meet adjacent surfaces neatly and look intentional from every angle.
Communication matters too. Property owners should know what is being installed, what the timeline looks like, and what to expect during the work. A reliable contractor keeps the project moving without making the customer manage every step.
That practical, full-service approach is where companies like Greenstone Landscaping Co can bring real value. When patio work is considered alongside planting, sod, concrete, and the overall look of the exterior, the result tends to feel more complete and less pieced together.
Long-term performance starts with the first install
A paver patio should do more than photograph well after completion. It should still look good after seasons of rain, sun, furniture movement, and everyday use. That kind of performance starts with correct prep, sound grading, and careful installation, not with shortcuts that stay hidden until the problems show up.
If you are planning a new patio, it helps to think beyond color samples and shape ideas. Ask how the base will be built, how drainage will be handled, and how the patio will relate to the rest of the property. Those answers tell you a lot about whether the finished space will simply look nice for now or actually hold up.
The best patio projects are the ones that make outdoor living easier, cleaner, and more enjoyable without creating extra headaches later. When the installation is done right, that is exactly what a paver patio can deliver.