
A stamped concrete patio or driveway can look sharp for years, but only if the installation is handled with precision from the start. If you are researching how to install stamped concrete, the biggest thing to understand is this: the finished pattern is only as good as the prep, timing, and concrete placement underneath it. The decorative surface gets the attention, but the real success comes from the steps most people never see.
For homeowners and property managers, that matters because stamped concrete is not a forgiving project. Small mistakes in grading, mix timing, coloring, or stamping pressure can show up fast as uneven texture, weak spots, poor drainage, or premature cracking. Done well, though, stamped concrete gives you the look of stone, brick, or slate with a cleaner installation and lower maintenance than many individual paver systems.
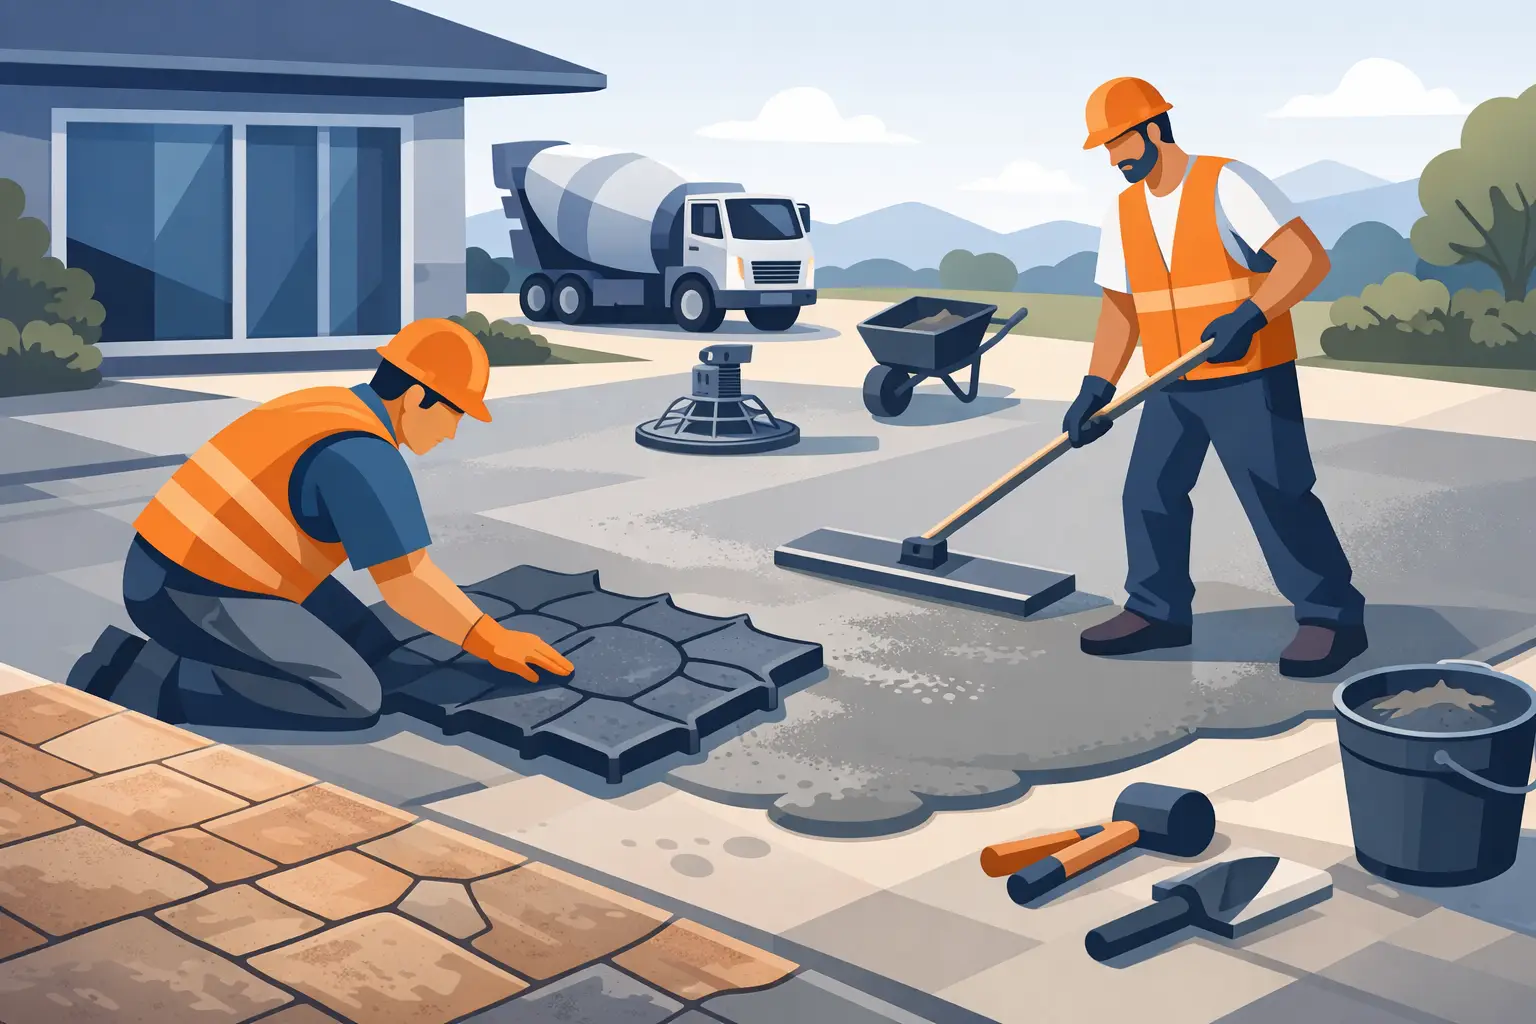
How to install stamped concrete: start with the base
Before concrete is ever poured, the site has to be excavated and shaped correctly. This step sets the stage for appearance, drainage, and long-term performance. A patio that looks great on day one but holds water after every rain is not a successful install.
The area is first laid out to the correct dimensions and slope. In most residential projects, the surface needs a slight pitch to move water away from the house and prevent puddling. Then the crew removes grass, soft soil, roots, and any unstable material. If the subgrade is weak and gets left in place, the concrete can settle or crack unevenly later.
After excavation, a compacted stone base is installed. This is one of the most important parts of the job. The base creates support, improves drainage, and helps the slab perform more consistently through weather changes. Thickness can vary based on soil conditions and intended use. A stamped concrete driveway usually needs a stronger base and slab design than a backyard patio because of vehicle weight.
Forms are then set to establish the final shape and edge lines. Reinforcement may also be added depending on the slab size, use, and local conditions. Wire mesh or rebar can help control movement, but reinforcement is not a substitute for proper base prep. If the groundwork is rushed, the slab will still have problems.
Choose the right mix, color, and pattern
Stamped concrete is not just regular concrete with a pattern pressed into it. The mix has to be suitable for decorative finishing, and the installation crew has to manage timing closely. If the concrete sets too quickly, there may not be enough time to stamp it cleanly. If it stays too wet, the pattern can look muddy or distorted.
Color is usually added in one of two ways. An integral color is mixed into the concrete so the slab has consistent color throughout. A release color is often applied on the surface before stamping to keep the mats from sticking and to create extra depth and contrast in the finished texture. That layered look is one reason stamped concrete can resemble natural stone so effectively.
Pattern selection also matters more than many people expect. Large stone patterns can look great on broad patios, but they may feel oversized in a small side yard or narrow walkway. Brick and ashlar patterns tend to suit more traditional homes, while slate textures often fit modern or transitional exteriors. The best choice depends on the scale of the space, the style of the property, and how the concrete ties into nearby features.
Pouring and finishing the slab
Once the site is ready and the crew is prepared, the concrete is poured into the forms and spread evenly. This stage moves fast. The slab has to be placed, screeded, and floated while the concrete is still workable, and the crew needs to stay ahead of the set time without overworking the surface.
Screeding levels the slab to the correct grade. Floating smooths out ridges and begins bringing the surface into condition for stamping. At this point, edge work and joints also come into play. Clean edges help the project look finished, and control joints help guide shrinkage cracks into more controlled lines. Those joints need to be planned with the pattern so they do not look random or interrupt the design more than necessary.
One trade-off with stamped concrete is that decorative appearance and crack control have to be balanced carefully. You want the pattern to read naturally, but you also need practical joint placement. That is part of why layout experience matters so much.
The stamping stage is all about timing
This is the step most people picture when they think about how to install stamped concrete, and it is also the step where rushed work becomes obvious. Stamping begins only after the surface has firmed up enough to hold the pattern but remains soft enough to accept a full impression.
Before the mats are placed, release agent is applied if that color method is part of the system. Then the stamping mats are laid down in sequence and pressed into the slab. The crew has to keep pattern lines aligned, maintain consistent pressure, and move across the slab efficiently. If one section is stamped too early and another too late, the texture depth can vary and the surface may look patchy.
Detailing tools are often used around edges, corners, steps, and tight spots where full-size mats do not fit. This is another area where workmanship shows. The best stamped concrete jobs look natural across the entire slab, not just in the wide-open center where the mats were easiest to use.
Weather can complicate this stage. Hot sun, wind, and low humidity can speed up surface drying and shorten the working window. Cooler conditions may buy more time, but they can also affect curing. It depends on the day, the slab size, and the mix design. Decorative concrete is very schedule-sensitive, which is why experienced crews plan manpower and sequencing before the truck arrives.
Curing, cleaning, and sealing
After stamping is complete, the concrete needs time to cure properly. This is where patience protects the investment. Walking on it too soon, washing it aggressively, or sealing it before it is ready can affect the final result.
If a release powder was used, the surface is cleaned after the concrete has cured enough. Some of that release remains in low spots and textured areas to create the antique effect, while excess material is washed away. The slab is then allowed to dry fully before sealer is applied.
Sealing gives stamped concrete its finished look and helps protect it from moisture, surface wear, stains, and color fading. It can also deepen the color and make the pattern stand out more clearly. For patios and driveways, the right sealer matters. Too much sealer or the wrong type can lead to a slippery surface or an artificial-looking shine. For many properties, a more natural finish is the better choice.
Common mistakes that shorten the life of stamped concrete
Most stamped concrete problems are not caused by the pattern itself. They start earlier. Poor compaction, weak drainage, inconsistent slab thickness, rushed finishing, and mistimed stamping are some of the biggest issues.
Another common mistake is treating stamped concrete like a simple cosmetic upgrade instead of a structural surface. A driveway has to support vehicles. A patio has to shed water away from the home. If design decisions focus only on color and pattern without considering use, the result may look good at first but wear poorly.
Maintenance matters too. Even a well-installed slab benefits from periodic cleaning and resealing. That does not mean constant upkeep, but it does mean paying attention over time. Decorative concrete lasts longer when it is protected before wear becomes obvious.
When professional installation makes the most sense
Technically, stamped concrete can be explained in steps, but installing it successfully is harder than the process makes it sound. Concrete work is already time-sensitive. Decorative concrete adds another layer of precision because the finish cannot be corrected easily once the slab sets.
For larger patios, driveways, pool decks, or projects with tight drainage requirements, professional installation is usually the smarter route. It reduces the risk of uneven color, poor pattern alignment, drainage problems, and surface defects that are expensive to fix later. For property owners who want the look of natural stone without the maintenance of individual units, the value is in getting a surface that performs as well as it looks.
At Greenstone Landscaping Co, projects like stamped concrete patios and driveways are approached with that bigger picture in mind - solid prep, clean installation, and a finished surface that fits the property instead of just filling space.
If you are planning stamped concrete, think beyond the pattern sample. The best result comes from a slab that is graded right, installed right, and finished with enough care to keep looking good long after the pour day is over.